This post is part 2 of my blog series “Building a Public-Facing Website on Office 365”:
- Creating a Public-Facing Website on Office 365 – Part 1 (Limitations)
- Office 365 Public-Facing Websites - Master Pages & Page Layouts with Design Manager – Part 2 (This post)
SharePoint has traditionally been a specialist area where it comes to design and branding.
This post tests the claims that “any design package including Dreamweaver can be used” and “no prior knowledge of SharePoint is required” and will compare the Office 365 version of Design Manager with the on-premises version.
Design Manager
Design Manager is Microsoft’s new tool to streamline the journey from Design to Implementation.
Office 365 includes some but not all of the Office 365 private site collection features (or indeed on-premises features):
The obvious difference as noted in Part 1 is the lack of control over Device Channels. One can only imagine that device channel performance hasn’t been tested sufficiently for potentially millions of visitors to a site, but at least there is a single mobile device channel.
I’ll be ignoring Themes and move onto creating an actual website in SharePoint 2013 online.
Responsive HTML & CSS
The great thing with Design Manager is that an agency without SharePoint expertise can supply HTML, CSS & images already cut; in some cases this can be really useful.
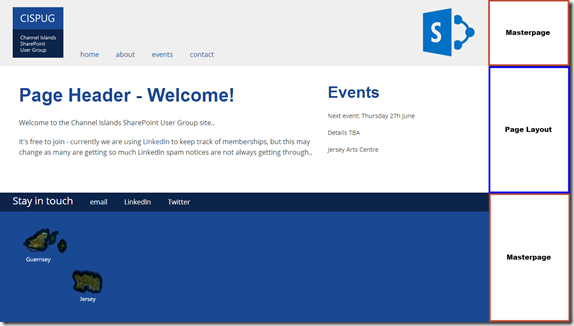
In this case I’ve created a basic HTML & CSS website on my local machine (which would be turned into a Master Page and Page Layout):
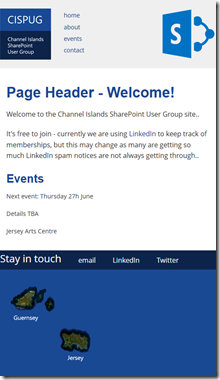
To keep in vogue with the cool kids, I also crafted a basic responsive version:
Design Manager – Creating a Master Page
1. Upload Design Files
To create a master page from your local “Design Files” content (HTML, CSS, Script & images), you can either:
- Map a drive to the Master Page Gallery [siteroot]\_catalogs\masterpage and copy all your local files
- Upload the files to the Master Page Gallery via SharePoint Designer
It is preferable to map a drive as this will facilitate later changes to the design files.
2. Convert and HTML file to a SharePoint master page
The Design Manager may be used to convert the uploaded HTML file to a master page:
Select the uploaded page:
If all goes well, there will be a Conversion Successful message and you can preview your new Master Page:
It’s worth noting that conditional CSS comments to deal with previous versions of IE, for example, are best placed around the <body> tag and not the <html> tag as the XML must validate, which means only one root <html> element.
A really important area to note (not visible on the above image due to scrolling issues…) is the main Content area:
The above Div shows the user where to place their content; by mapping a drive as described earlier (or by using SharePoint Designer) with a bit of common sense, it is easy to paste the main Content Area into the right location in your HTML file and upload again:
The hard-coded content in the example above (Page Header & Events columns) will end up being part of the Page Layout for this type of page.
Design Manager – Creating a Page Layout
Design Manager gives you an option to Create a Page Layout based on existing Page Layouts:
As always giving a descriptive name is useful; I’ve added the 2 Columns and CISPUG so I know it’s “mine” and has 2 columns.
The result is a Page Layout with a number of Content Areas or “Snippets” that you may want to include in your Page Layout:
The HTML rendered automatically by SharePoint for this Page Layout build is a bit ugly but it’s easy enough to trim the unnecessary from this:
to this:
It’s not the most beautiful code but it’s readable and understandable.
After moving the relevant sections from the Page Layout into the containers I had setup in raw HTML as part of my original design files, the resulting preview looks as follows:
That’s all for Part 2 – Part 3 coming soon!
Hope that helps, comments welcome!


Leave a Reply